Welcome to our expert guide on achieving a smooth and bubble-free clear epoxy resin application. Whether you’re a seasoned DIY enthusiast or a professional artist, we’re here to help you master the art of resin application. With our tips and techniques, you can create stunning, flawless finishes that will impress everyone.
Working with epoxy resin can be a rewarding experience, but it requires attention to detail and a proper understanding of the process. Bubbles are a common challenge that can detract from the beauty of your finished piece. However, with the right knowledge and techniques, you can minimize or eliminate bubbles altogether, achieving a professional-grade result.
In this guide, we will walk you through each step of the epoxy resin application process. From surface preparation to mixing the resin and hardener, applying thin layers, and dealing with common bubble issues, we’ve got you covered. We’ll also share tips on curing and drying techniques, sanding and polishing for a flawless finish, and adding a clear topcoat for extra protection. Plus, we’ll provide guidance on cleaning and maintaining your epoxy resin surface for long-lasting beauty.
Key Takeaways:
- Proper surface preparation is essential for a smooth and bubble-free epoxy resin application.
- Choose the right epoxy resin for your project to ensure a seamless finish.
- Mix the resin and hardener properly following the recommended ratios and techniques.
- Apply epoxy resin in thin layers to prevent the formation of bubbles.
- Use a heat gun or torch to eliminate any bubbles that may occur during the application process.
Understanding the Importance of Surface Preparation
Proper surface preparation is essential before applying clear epoxy resin. Neglecting this crucial step can result in adhesion issues and the formation of unsightly bubbles. To ensure a successful epoxy resin application, it’s important to understand the significance of cleaning and priming the surface.
When it comes to cleaning the surface, start by removing any dust, dirt, or grease using a gentle cleanser. This will create a clean and debris-free surface for the resin to adhere to. After cleaning, be sure to allow the surface to dry completely before moving forward.
“A clean surface is the foundation for a flawless epoxy resin application.”
In addition to cleaning, priming the surface is equally important. A high-quality primer creates a strong bond between the surface and the epoxy resin, ensuring better adhesion and minimizing the risk of bubbles. Choose a primer that is compatible with your specific project and follow the manufacturer’s instructions for application.
By dedicating time to surface preparation, you set the stage for a successful epoxy resin project. This initial step is worth the effort, as it significantly contributes to achieving a seamless and bubble-free finish.
Once the surface is properly prepared, you’ll be ready to move on to the next steps in the epoxy resin application process. Stay tuned to learn more about choosing the right epoxy resin for a smooth finish and expert techniques for mixing, applying, and curing the resin.
Choosing the Right Epoxy Resin for a Smooth Finish
When it comes to achieving a smooth and flawless epoxy resin finish, selecting the right type of resin is crucial. With so many options available, it’s important to understand the different epoxy resin techniques and choose the one that suits your project best. Allow us to guide you through the various types of epoxy resins to help you make an informed decision.
Type of Epoxy Resins
Epoxy resins come in different formulas and viscosities, each designed for specific applications. The three main types of epoxy resins you will commonly encounter are:
- Casting Resins: Ideal for projects that require thicker pours, such as creating large tabletops or filling molds. Casting resins have a slower curing time, allowing for better air release during the curing process.
- Coating Resins: These resins are perfect for coating surfaces, such as artwork, countertops, or bar tops. They have a lower viscosity, which makes them self-leveling and easy to spread evenly.
- Laminating Resins: Laminating resins are commonly used for fiberglass and composite construction. They have excellent wetting properties, ensuring strong adhesion to various surfaces.
Before making a decision, consider the specific requirements of your project and the desired result. Each type of epoxy resin has its own advantages and limitations, so it’s crucial to choose the one that aligns with your needs.

Factors to Consider
When selecting an epoxy resin, keep in mind the following factors:
- Cure Time: Depending on your project timeline, choose a resin with a cure time that suits your needs. Some resins cure quickly, allowing for faster project completion, while others require a longer curing period.
- Viscosity: Consider the viscosity of the resin as it affects how easily it spreads and self-levels. Thinner resins work well for thin coatings, while thicker ones are better for casting thicker layers.
- UV Resistance: If your project will be exposed to sunlight, opt for a resin with UV resistance to prevent yellowing or discoloration over time.
- Strength and Durability: Evaluate the strength and durability properties of the resin, especially if your project will undergo heavy use or needs to withstand impacts or wear.
By considering these factors and understanding the specific requirements of your project, you can confidently choose the right epoxy resin to achieve a smooth and professional finish.
Epoxy Resin Comparison
| Epoxy Resin Type | Cure Time | Viscosity | UV Resistance | Strength and Durability |
|---|---|---|---|---|
| Casting Resin | Longer cure time | Thicker viscosity | Some variants have UV resistance | High strength and durability |
| Coating Resin | Quick cure time | Thinner viscosity | Available with UV resistance | Good strength and durability |
| Laminating Resin | Moderate cure time | Thicker viscosity | May lack UV resistance | Excellent strength and durability |
Remember, the provided information is a general guide. Always refer to the manufacturer’s instructions and specifications for detailed guidance on each epoxy resin type.
We understand that selecting the right epoxy resin can feel overwhelming, but with our guidance, you can confidently choose the best one for your project. Let’s dive into the exciting world of epoxy resin techniques and create a smooth and stunning finish together!
Mixing the Resin and Hardener Properly
Properly mixing the resin and hardener is a crucial step in achieving a bubble-free epoxy resin application. Follow the step-by-step instructions below to ensure proper mixing ratios and techniques:
- Measure accurately: Carefully measure the recommended amounts of resin and hardener according to the manufacturer’s instructions. Use a digital scale for precise measurements.
- Choose the right container: Select a clean, non-reactive container that is large enough to accommodate the resin and hardener without overflowing. A plastic or silicone mixing cup is ideal.
- Pour resin first: Start by pouring the measured amount of resin into the mixing container.
- Add the hardener: Slowly add the measured amount of hardener to the resin. Ensure that the ratios are correct, as this will affect the curing process and final result.
- Mix thoroughly: Use a stir stick or paddle to mix the resin and hardener together. Make sure to scrape the sides and bottom of the container to incorporate all the ingredients.
- Continue mixing: Mix the resin and hardener until they are well blended and no streaks or swirls are visible. This typically takes 2-3 minutes of constant stirring.
Remember, improper mixing can lead to uneven curing, surface imperfections, and trapped bubbles in your epoxy resin project. Take your time and follow these steps to ensure a successful and bubble-free application.
Properly mixing the resin and hardener is crucial for achieving a bubble-free application.
Applying the Epoxy Resin in Thin Layers
When it comes to achieving a seamless epoxy resin finish, applying the resin in thin layers is key. This technique helps prevent bubbles and ensures a smooth and professional-looking result.
To properly apply thin coats of epoxy resin, follow these essential tips:
- Prepare your workspace: Clear away any clutter and ensure your work area is clean and well-ventilated. This will help prevent dust and debris from settling on the resin as it cures.
- Use the right tools: Choose a high-quality brush or applicator recommended for epoxy resin application. This will help you achieve even and controlled coverage.
- Mix the resin and hardener properly: Follow the manufacturer’s instructions to accurately measure and mix the resin and hardener. A thorough and consistent mixture will ensure optimal curing and prevent uneven coatings.
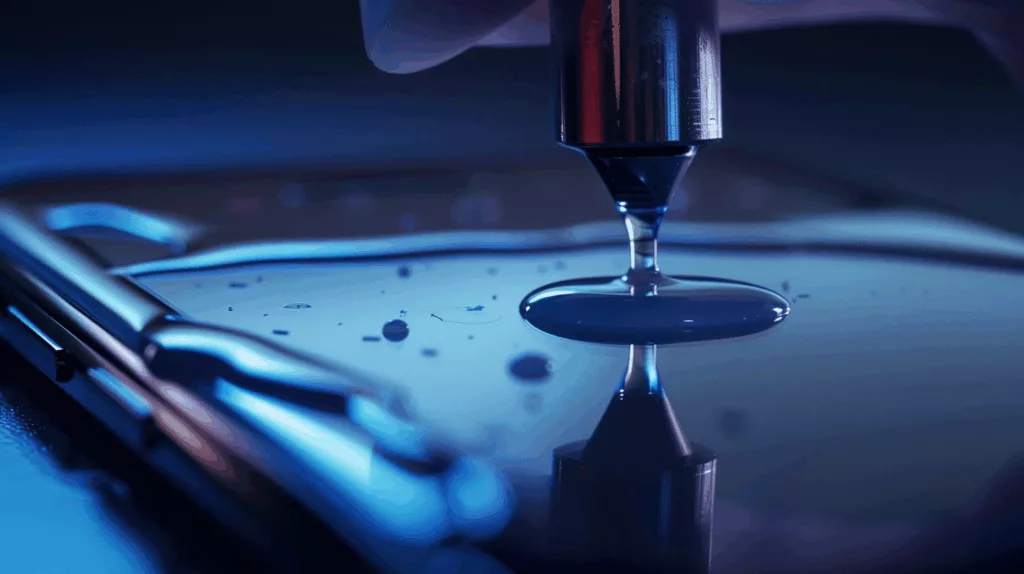
- Apply the first layer: Start by applying a thin and even layer of epoxy resin to your prepared surface. Use smooth and deliberate strokes to avoid introducing air bubbles.
- Eliminate bubbles: After applying each layer, use a heat gun or torch to gently pass over the surface. This will help remove any trapped air bubbles and create a seamless finish. Be careful not to overheat or scorch the resin.
- Allow proper curing time: Follow the recommended curing time provided by the epoxy resin manufacturer. Avoid disturbing the resin during this period to prevent imperfections.
- Apply additional thin layers: If necessary, apply additional thin layers to build up the desired thickness and enhance the durability of the coating. Allow each layer to fully cure before applying the next.
- Sand and polish: Once the final layer has cured, sand the surface lightly to remove any imperfections or uneven areas. Finish off by polishing the surface to achieve a glossy and flawless result.
By following these epoxy resin tips and applying the resin in thin layers, you can achieve a seamless finish with minimal bubbles. Now let’s explore how to use a heat gun or torch to eliminate any bubbles that may have formed during the application process.

Using a Heat Gun or Torch to Eliminate Bubbles
In our quest for achieving a bubble-free clear epoxy resin application, we have explored various techniques and tips. Now, we delve into the use of a heat gun or torch to eliminate pesky bubbles that may have formed during the resin application process. This method is particularly effective in ensuring a flawless finish.
When using a heat gun or torch, it’s essential to prioritize safety. Make sure to work in a well-ventilated area and wear appropriate protective gear, including gloves and safety glasses. Keep in mind that excessive heat can damage the resin or surrounding materials, so exercise caution and always follow the manufacturer’s instructions.
Here are some valuable tips to effectively eliminate bubbles using a heat gun or torch:
- Begin by removing any loose debris or dust from the surface using a soft brush or compressed air.
- Set the heat gun or torch to a low or medium setting to prevent overheating.
- Hold the heat source approximately 6 to 8 inches away from the resin surface.
- Using slow and sweeping motions, pass the heat source over the affected areas, focusing on the bubbles.
- Observe the bubbles closely as they heat up and disappear. Be careful not to overheat the resin or create new bubbles by exerting too much heat in one area.
- Continue applying heat until the bubbles are completely eliminated.
Remember, practice makes perfect! It may take some trial and error to find the optimal heat gun or torch technique for your specific project. Be patient and strive for a gradual application of heat to achieve the desired results.
To ensure an even application of heat and avoid overheating, I recommend using a heat gun with adjustable temperature settings. This will give you better control over the amount of heat applied, minimizing the risk of damaging your resin or compromising the final finish.
Incorporating the heat gun or torch technique into your epoxy resin application process can help you achieve a flawless and bubble-free result. However, it’s important to note that prevention is always better than cure. By following the proper surface preparation techniques, using thin layers, and employing other epoxy resin tips and techniques we have mentioned earlier, you can reduce the chances of bubble formation and create a stunning, professional-looking project.
Now that we’ve explored how to use a heat gun or torch to eliminate bubbles, let’s move on to Section 7, where we will address common bubble issues and provide solutions to successfully fix or prevent them.
Dealing with Common Bubble Issues
While we strive for a bubble-free application, sometimes bubbles may still appear. Don’t worry, we’ve got you covered! In this section, we’ll address common bubble issues that may arise during the epoxy resin application process and provide effective solutions to fix or prevent them.
First, let’s take a look at some of the common causes of bubbles:
- Inadequate mixing of the resin and hardener
- Using a heat gun or torch incorrectly
- Applying resin in thick layers
- Foreign particles or dust on the surface
Fixing Bubbles
If bubbles have already formed in your epoxy resin, don’t panic! Here’s what you can do:
- Torch Method: Use a handheld torch or heat gun to carefully pass over the surface of the resin. The heat will cause the bubbles to rise and burst, resulting in a smooth finish. Remember to keep the torch moving to avoid overheating or scorching the resin.
- Popping Method: Gently pop the bubbles with a pin or toothpick. Take extra care not to scratch the surface of the resin while doing this. After popping the bubbles, use a heat gun or torch to remove any remaining bubbles.
- Sanding Method: If the bubbles are small and not too many, you can sand down the surface of the cured resin using fine-grit sandpaper. This method is suitable for minor imperfections and provides a smooth result.
Remember to always wear protective gloves and eye gear when working with epoxy resin and heat sources.
Preventing Bubbles
Prevention is key when it comes to achieving a bubble-free epoxy resin application. Here are some preventive measures you can take:
- Proper Mixing: Thoroughly mix the resin and hardener according to the manufacturer’s instructions. Avoid excessive stirring, as it can introduce air bubbles into the mixture.
- Thin Layer Application: Apply epoxy resin in thin, even layers to minimize the chances of bubbles forming. Multiple thin layers are better than a single thick layer.
- Surface Preparation: Ensure the surface is clean and free from any dust or debris before applying the resin. Use a lint-free cloth and denatured alcohol to wipe the surface and remove any contaminants.
- Use a Bubble Breaker: A bubble breaker tool, such as a foam brush or roller, can help remove air bubbles during the application process. Simply glide the tool lightly over the resin to break any bubbles.
By following these preventive measures and applying the correct bubble-fixing techniques, you’ll be well-equipped to achieve a flawless and professional epoxy resin finish.
| Cause of Bubbles | Solution |
|---|---|
| Inadequate mixing of the resin and hardener | Thoroughly mix the resin and hardener according to manufacturer’s instructions |
| Using a heat gun or torch incorrectly | Keep the torch or heat gun moving and avoid overheating the resin |
| Applying resin in thick layers | Apply epoxy resin in thin, even layers |
| Foreign particles or dust on the surface | Ensure the surface is clean and free from debris |

Proper Curing and Drying Techniques
Properly curing and drying epoxy resin is crucial to achieving a flawless and professional finish. It ensures the resin hardens fully, providing a durable and glossy coating that will stand the test of time. Follow our expert techniques for proper epoxy resin curing and drying to elevate your project to the next level.
Curing Process
The curing process of epoxy resin involves allowing it to chemically react and harden over time. This process is typically done at room temperature and can take anywhere from 24 to 72 hours, depending on the specific resin product and environmental conditions.
During the curing process, it is important to keep the resin in a controlled environment to prevent dust particles or debris from settling on the surface. Covering the project with a dust-free dome or using a dedicated curing box can help create the ideal conditions for a smooth and pristine finish.
Optimal Drying Conditions
To ensure optimal drying conditions for your epoxy resin project, keep these factors in mind:
- Temperature: Maintain a temperature range of 70°F to 80°F (21°C to 27°C) during the drying process. Extreme temperature fluctuations can negatively impact the resin’s curing and drying properties.
- Humidity: Aim for a humidity level of around 50% to 70%. High humidity can prolong the drying time, while low humidity may cause the resin to cure too quickly, leading to potential imperfections.
- Ventilation: Provide adequate ventilation in the drying area to allow any vapors to dissipate and prevent the buildup of fumes. However, avoid direct drafts that can disrupt the resin’s surface.
Tips for a Durable and Glossy Coating
Follow these expert tips to ensure a durable and glossy coating:
- Patience is key: Resist the temptation to touch or manipulate the resin during the curing and drying process, as this can leave fingerprints or disturb the smooth surface.
- Avoid direct sunlight: Exposing epoxy resin to direct sunlight during the drying process can lead to yellowing or discoloration. Keep your project in a shaded area to preserve its clarity.
- Polishing for added shine: Once the resin has fully cured and dried, you can enhance its glossy appearance by polishing it with a fine-grit sandpaper followed by a high-quality compound or polish. This will give your project a mirror-like finish.
Remember, proper curing and drying techniques are essential for achieving a flawless finish with your epoxy resin. By meticulously following these steps, you can ensure a durable and glossy coating that showcases your craftsmanship.
Sanding and Polishing the Epoxy Resin Surface
Sanding and polishing are essential steps in the process of achieving a flawless epoxy resin surface. By following our expert techniques, you can ensure a smooth and mirror-like finish for your project.
- Choosing the Right Sandpaper Grits: To begin, it is important to select the appropriate sandpaper grits for your epoxy resin surface. We recommend starting with a lower grit, such as 80 or 120, for initial sanding to remove any imperfections or unevenness. Gradually progress to higher grits, such as 220 and 400, to achieve a smooth and polished surface.
- Progressive Sanding Technique: When sanding epoxy resin, it is crucial to use a progressive sanding technique. Start with light, even pressure and gradually increase it as you progress through the grits. This method helps to avoid excessive sanding in specific areas.
- Water-Based Sanding: For wet sanding, it is recommended to use water as a lubricant to reduce friction and prevent the sandpaper from clogging. Wet sanding also helps to achieve a smoother finish and minimize the risk of scratching the epoxy resin surface.
Once you have completed the sanding process, it’s time to move on to polishing the epoxy resin surface. Polishing helps to enhance the clarity and shine of the resin, giving it a flawless appearance.
- Using Polishing Compounds: Start by applying a polishing compound specifically designed for epoxy resin. Apply a small amount of the compound to a soft cloth or polishing pad and gently buff the resin surface using circular motions. This will help remove any fine scratches and bring out the resin’s natural luster.
- Final Polishing: To achieve a truly mirror-like finish, you can further polish the epoxy resin surface using a high-quality polishing paste. Apply a small amount of the paste to a clean cloth or polishing pad and continue the circular buffing motion until the desired level of shine is achieved.
Remember to always follow safety precautions when sanding and polishing epoxy resin surfaces, such as wearing protective gloves and a dust mask to avoid inhaling any particles. Regularly clean and inspect your sandpaper and polishing tools to ensure optimal performance.

With the proper sanding and polishing techniques, you can achieve a flawless epoxy resin surface that showcases the beauty of your project. Take your time, follow our tips, and enjoy the satisfaction of creating a professional-quality finish.
Adding a Clear Topcoat for Extra Protection
To ensure the longevity and durability of your flawless epoxy resin coating, it is essential to apply a clear topcoat. This additional layer provides extra protection against scratches, UV rays, and other potential damage, prolonging the beauty and integrity of your project.
By following our epoxy resin techniques, you can achieve a professional and long-lasting finish:
- Clean the Surface: Before applying the topcoat, make sure the epoxy resin surface is clean, smooth, and free of any debris or imperfections.
- Choose the Right Topcoat: Select a high-quality clear topcoat designed specifically for epoxy resin. Look for products that offer UV resistance and high durability.
- Apply Evenly: Use a bristle brush or foam roller to apply the topcoat evenly over the entire epoxy resin surface. Pay attention to any edges or corners to ensure complete coverage.
- Allow Sufficient Drying Time: Follow the manufacturer’s instructions regarding the drying time between coats and the overall curing process.
- Sand and Polish: Once the topcoat is fully cured, lightly sand the surface using progressively finer grits of sandpaper. Then, polish the surface using a polishing compound and a clean cloth or buffer.
By adding a clear topcoat, you not only enhance the protection of your epoxy resin project but also deepen the shine and brilliance of the surface. This final touch takes your flawless epoxy resin coating to the next level, creating a stunning and durable finish.
Remember, the quality of your topcoat is crucial for achieving the best results. Invest in a reputable brand and follow the recommended application techniques for optimal performance.
Explore our selection of top-quality clear topcoats and take your epoxy resin projects to new heights of beauty and protection.
| Benefits of Adding a Clear Topcoat | Tips for Applying the Topcoat |
|---|---|
| Protection against scratches and abrasions | Clean the surface thoroughly before application |
| Enhanced UV resistance | Choose a high-quality clear topcoat |
| Increased durability against wear and tear | Apply the topcoat evenly using a brush or roller |
| Deepens the shine and brilliance of the epoxy resin surface | Allow sufficient drying time between coats |
| Provides an additional layer of protection | Sand and polish the surface for a smooth finish |
Cleaning and Maintaining Your Epoxy Resin Surface
Proper cleaning and maintenance are crucial for preserving the beauty and integrity of your epoxy resin surface. By following these best epoxy resin practices and tips, you can ensure the longevity of your finished project and keep it looking as good as new.
Regular Cleaning Routine
Creating a regular cleaning routine is essential to prevent dirt, dust, and grime from accumulating on your epoxy resin surface. Here are some practices to keep in mind:
- Dust and sweep: Use a soft-bristle broom or a microfiber mop to remove any loose particles. Avoid using rough tools or abrasive materials that may scratch the resin.
- Gentle cleaning solution: Mix a mild dish soap or a dedicated epoxy resin cleaner with water. Dip a soft cloth or sponge into the solution and gently wipe the surface to remove stains or spills. Avoid scrubbing vigorously.
- Rinse thoroughly: After cleaning, rinse the surface with clean water to remove any residue from the cleaning solution. Ensure that no soap or cleaner is left behind.
- Dry completely: Allow the epoxy resin surface to air dry or use a soft, lint-free cloth to gently pat it dry. Avoid using heat or excessive moisture during the drying process.
Preventing Stains and Damage
To maintain the pristine look of your epoxy resin surface, it’s important to take preventative measures against stains and damage:
- Use coasters and trivets: Place coasters under hot beverages and trivets under hot pots and pans to avoid direct contact with the resin. This will prevent heat marks and potential discoloration.
- Avoid sharp objects: Do not cut directly on the epoxy resin surface or use sharp objects that may leave scratches. Always use cutting boards or protective mats.
- Protect against UV exposure: If your epoxy resin surface is exposed to direct sunlight, consider using window coverings or UV-blocking films to prevent discoloration or yellowing over time.
- Wipe spills immediately: Accidental spills should be wiped up promptly using a soft cloth or paper towel to prevent staining or damage to the epoxy resin.
Regular Inspections and Touch-Ups
Periodically inspect your epoxy resin surface for any signs of wear, scratches, or other issues. If you notice any damage, it’s important to address it promptly to prevent further deterioration. Here are some tips for touch-ups:
- Surface repairs: For small scratches or superficial damage, you can use a specialized epoxy resin repair kit to fill in the affected areas. Follow the manufacturer’s instructions carefully for the best results.
- Recoating: If your epoxy resin surface starts to lose its glossy finish or shows signs of wear, you can apply a fresh coat of clear epoxy resin to rejuvenate its appearance. Ensure proper surface preparation and follow the recommended curing time before using the surface again.
By incorporating these epoxy resin tips into your cleaning and maintenance routine, you can enjoy the beauty and longevity of your epoxy resin surface for years to come.
Expert Tip
“Regular cleaning and maintenance are key to preserving the beauty and integrity of your epoxy resin surface. By following a proper cleaning routine and taking preventative measures, you can maintain a flawless finish.”
Conclusion
In conclusion, achieving a smooth and bubble-free clear epoxy resin application requires a combination of proper surface preparation, precise resin and hardener mixing, thin layer application, effective bubble elimination techniques, and careful curing and drying.
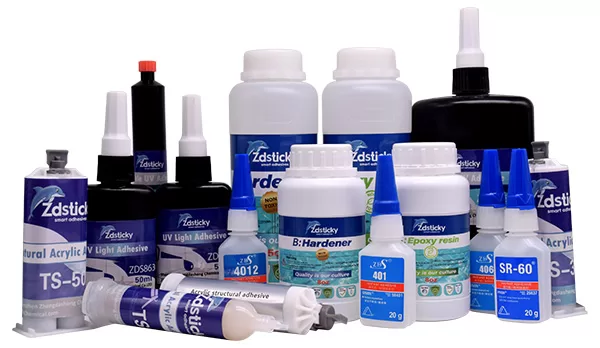
By following these tips and techniques, you can consistently achieve a flawless and professional finish every time with the ZDS™ epoxy resin. Start by thoroughly cleaning and priming the surface to ensure optimal adhesion. Then, carefully mix the resin and hardener according to the manufacturer’s instructions, taking care to maintain the correct ratios.
When applying the epoxy resin, remember to work in thin layers, allowing each coat to dry and cure properly before applying the next. Use a heat gun or torch to eliminate any bubbles that may have formed during the application process, taking the necessary safety precautions. Finally, ensure proper curing and drying to achieve a durable and glossy coating.
With these techniques and the use of high-quality ZDS™ epoxy resin, you can confidently create stunning and flawless epoxy resin projects that will impress and delight. Happy crafting!
FAQ
Why is surface preparation important before applying epoxy resin?
Proper surface preparation is crucial to ensure optimal adhesion of the epoxy resin and prevent bubbles. Cleaning and priming the surface remove any dirt, dust, or contaminants that can interfere with the resin’s bonding ability.
How do I choose the right epoxy resin for a smooth finish?
Choosing the right epoxy resin depends on your specific project requirements. Consider factors like viscosity, cure time, UV resistance, and desired finish. Research different epoxy resins available in the market and select a high-quality product that suits your needs.
How do I mix epoxy resin and hardener properly?
To achieve a bubble-free application, follow the manufacturer’s instructions for resin and hardener mixing ratios. Use clean and separate measuring containers for each component. Stir the mixture thoroughly but avoid introducing excessive air to prevent bubbles.
Can I apply epoxy resin in thick layers?
It is recommended to apply epoxy resin in thin layers, typically 1/8 to 1/4 inch thick. Thin layers allow for better control and help prevent bubbles from forming. If thicker layers are required, make sure to apply them in multiple coats, allowing each layer to cure properly before adding the next.
How can I eliminate bubbles from epoxy resin?
You can use a heat gun or torch to remove bubbles from the epoxy resin surface. Carefully wave the heat gun or torch over the resin, keeping it at a distance to avoid scorching. The heat helps the bubbles rise to the surface and pop. Use caution and follow safety guidelines when working with heat tools.
What should I do if bubbles still appear in my epoxy resin?
If bubbles still appear, you can try using a toothpick or small needle to gently pop them. Alternatively, you can pour a thin layer of epoxy resin over the affected area to fill in the bubbles. Preventing bubbles requires proper mixing, thin layer application, and bubble elimination techniques.
How long does epoxy resin take to cure and dry?
The curing and drying time of epoxy resin varies depending on the product and ambient conditions. Most epoxy resins cure within 24 to 48 hours and reach full hardness within 7 days. Ensure proper ventilation and temperature control during the curing process to achieve optimal results.
How do I sand and polish the epoxy resin surface?
Start by sanding the epoxy resin surface with progressively finer grit sandpaper. Begin with a coarser grit (around 120) and gradually work your way up to a finer grit (up to 2000 or higher). After sanding, polish the surface using a polishing compound or epoxy resin-specific polish for a glossy finish.
Why should I apply a clear topcoat to my epoxy resin project?
Applying a clear topcoat adds an extra layer of protection to your epoxy resin project, enhancing its durability and longevity. The topcoat acts as a barrier against UV light, scratches, and stains, preserving the beauty and integrity of the resin surface.
How do I clean and maintain my epoxy resin surface?
To clean your epoxy resin surface, use a mild soap or detergent and warm water. Avoid abrasive cleaners or scrub brushes that can damage the resin’s glossy finish. Regularly inspect the surface for any signs of wear or damage and address them promptly to ensure long-lasting beauty.