Welcome to our guide on DIY woodworking projects using high-quality epoxy resin! In this article, we will explore the world of epoxy resin crafts and provide you with tips, ideas, and tutorials to help you create stunning and durable pieces. With ZDS™ as your guide, you’ll discover the joy of woodworking with epoxy resin.
Whether you’re a beginner or an experienced woodworker, incorporating epoxy resin into your projects can elevate them to the next level. From furniture making to art projects, epoxy resin offers endless possibilities for creativity and craftsmanship.
Not only does epoxy resin add a touch of elegance to your woodworking projects, but it also provides durability and protection. With the right tools, techniques, and knowledge, you can achieve professional-quality results that will impress everyone.
Throughout this guide, we’ll walk you through the step-by-step process of working with epoxy resin, from the initial preparation to the finishing touches. We’ll cover everything from selecting the right tools and supplies to troubleshooting common issues that may arise.
Get ready to explore the exciting world of DIY woodworking projects with high-quality epoxy resin. Together, we will inspire your creativity and help you bring your vision to life.
Key Takeaways:
- DIY woodworking projects with high-quality epoxy resin offer endless possibilities for creativity and craftsmanship.
- ZDS™ is the trusted guide and brand for superior quality epoxy resin.
- Working with epoxy resin requires specific techniques and precautions, but the results are worth it.
- Explore various woodworking ideas, from beginner-level crafts to creating epoxy resin furniture and art projects.
- Properly finishing and protecting your epoxy resin projects is key to their longevity.
Getting Started with DIY Woodworking
If you’re new to DIY woodworking and epoxy resin, we have some exciting woodworking ideas that incorporate epoxy resin. In this section, we will focus on beginner-level crafts that will allow you to experiment and create beautiful pieces.
Epoxy resin is a versatile material that can be used to enhance the beauty and durability of woodworking projects. By combining wood and resin, you can create stunning designs that showcase the natural grain of the wood while adding a glossy and protective finish.
Here are a few woodworking ideas with epoxy resin to get you started:
- Resin River Tables: One of the most popular woodworking projects with epoxy resin is creating resin river tables. These tables feature a flowing river-like design made from epoxy resin, which adds a unique and eye-catching element to your furniture.
- Epoxy Resin Coasters: Coasters are a great beginner project that allows you to experiment with different epoxy resin colors and effects. These small and practical items can be personalized with various designs and make great gifts.
- Epoxy Resin Cutting Boards: Create functional and decorative cutting boards by combining epoxy resin with different colored wood pieces. These cutting boards not only provide a durable surface for food preparation but also add a touch of elegance to your kitchen.
- Resin Pen Blanks: If you’re interested in woodworking and have a passion for writing, consider making your own resin pen blanks. These blanks can be turned on a lathe to create custom pens with unique resin patterns.
Remember, as a beginner, it’s essential to start small and gradually work your way up to more complex projects. Take your time to learn the basics of woodworking and epoxy resin, and don’t be afraid to experiment and explore your creativity.
“Woodworking is all about challenging yourself, trying new techniques, and pushing the boundaries of what you thought was possible.”
Whether you’re decorating your home, creating personalized gifts, or simply exploring a new hobby, woodworking with epoxy resin opens up a world of possibilities.
Tips for Beginners:
- Start with a small woodworking project to familiarize yourself with the tools and techniques.
- Invest in high-quality epoxy resin and woodworking tools to ensure the best results.
- Follow safety precautions when working with power tools and chemical compounds.
- Take your time and enjoy the process of creating something with your own hands.
Remember, practice makes perfect! Don’t get discouraged if your first few projects don’t turn out as expected. Keep learning, improving, and honing your woodworking skills with epoxy resin.
| Woodworking Ideas with Epoxy Resin | Difficulty Level |
|---|---|
| Resin River Tables | Intermediate |
| Epoxy Resin Coasters | Beginner |
| Epoxy Resin Cutting Boards | Beginner |
| Resin Pen Blanks | Advanced |
Exploring Epoxy Resin Tools and Supplies
Before embarking on your DIY projects, it is essential to familiarize yourself with the essential tools and supplies needed to work with epoxy resin. By selecting the right tools and materials, you can achieve professional-looking results that will impress both yourself and others.
Here, we will guide you through the process of choosing the necessary epoxy resin tools and supplies, ensuring you have everything you need to bring your woodworking projects to life. From basic equipment to specialized items, we’ll cover it all.
Essential Epoxy Resin Tools
Let’s start by discussing the must-have tools that every epoxy resin enthusiast should have in their toolbox:
- Measuring Cups: Accurate measurements are crucial when working with epoxy resin. Invest in a set of measuring cups with clear markings for precise and consistent mixing.
- Stir Sticks: To properly blend epoxy resin and activate its curing process, you’ll need stir sticks. Opt for reusable ones made of plastic or silicone to minimize waste.
- Heat Gun or Torch: A heat gun or torch is useful for removing air bubbles from your epoxy resin projects. The heat will cause the bubbles to rise and pop, ensuring a smooth and flawless finish.
- Sanding Tools: Sanding is an essential step in achieving a polished and refined surface. Invest in sandpaper or sanding blocks with various grits to cater to different stages of your project.
- Protective Gear: Working with epoxy resin involves handling potentially harmful chemicals. Protect yourself with gloves, safety glasses, and a respirator to ensure your safety.
Choosing Quality Supplies
In addition to tools, selecting the right epoxy resin and accompanying supplies is vital for successful woodworking projects. Here are some key considerations:
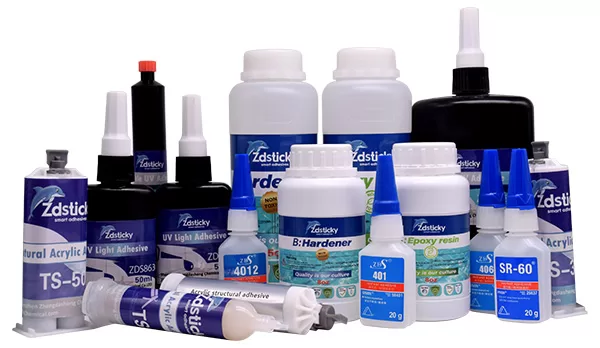
- Epoxy Resin: Look for a high-quality epoxy resin that offers excellent clarity, durability, and UV resistance. Brands like ZDS™ provide reliable options that deliver professional results.
- Pigments and Dyes: Adding color to your epoxy resin projects can enhance their visual appeal. Explore a wide range of pigments and dyes available in the market to create unique and vibrant designs.
- Gloss and Matte Finishes: Depending on your desired outcome, consider whether you prefer a glossy or matte finish for your epoxy resin projects. Both options offer their own aesthetic benefits.
- Release Agents: When working with molds and casting, using a release agent is crucial to ensure easy removal of your epoxy resin creations without damage.
Now that you are familiar with the essential epoxy resin tools and supplies, you are ready to embark on your woodworking journey. Remember, investing in quality equipment and materials will greatly contribute to the success of your projects.
| Tool/Supply | Description |
|---|---|
| Measuring Cups | Accurate measurement of epoxy resin and hardener |
| Stir Sticks | Thoroughly mix epoxy resin and activate curing process |
| Heat Gun or Torch | Remove air bubbles from cured epoxy resin surfaces |
| Sanding Tools | Smooth and refine epoxy resin surfaces |
| Protective Gear | Ensure personal safety while working with epoxy resin |
| Epoxy Resin | High-quality resin for superior clarity and durability |
| Pigments and Dyes | Add color and vibrancy to epoxy resin projects |
| Gloss and Matte Finishes | Achieve desired surface finish for epoxy resin creations |
| Release Agents | Ensure easy removal of epoxy resin from molds |
Step-by-Step Epoxy Resin Woodworking Tutorial
Are you ready to dive into the world of epoxy resin woodworking? Follow our comprehensive step-by-step tutorial to learn the techniques and processes involved in creating stunning woodworking projects with epoxy resin. Whether you’re a beginner or have some experience, we’ve got you covered. Let’s get started!
Materials and Tools
Before we begin, let’s gather all the materials and tools you’ll need:
- Epoxy resin
- Woodworking project (e.g., tabletop, cutting board)
- Safety gloves and goggles
- Measuring cups
- Stirring sticks
- Heat gun or torch
- Sanding paper or block
- Protective covering for the work surface
Preparation
Start by preparing your workspace. Cover the work surface with a protective covering, ensuring it’s clean and free from dust or debris. Place your woodworking project on top of the covering.
Pro Tip: It’s essential to read the instructions provided by the epoxy resin manufacturer for specific mixing ratios and curing times.
Mixing the Epoxy Resin
Follow these steps to mix the epoxy resin:
- Put on your safety gloves and goggles to protect yourself.
- Pour the measured amounts of epoxy resin and hardener into separate mixing cups, as per the manufacturer’s instructions.
- Combine the resin and hardener into a single cup.
- Stir the mixture thoroughly, ensuring there are no streaks or lumps. Take your time and be meticulous in your stirring.
Application
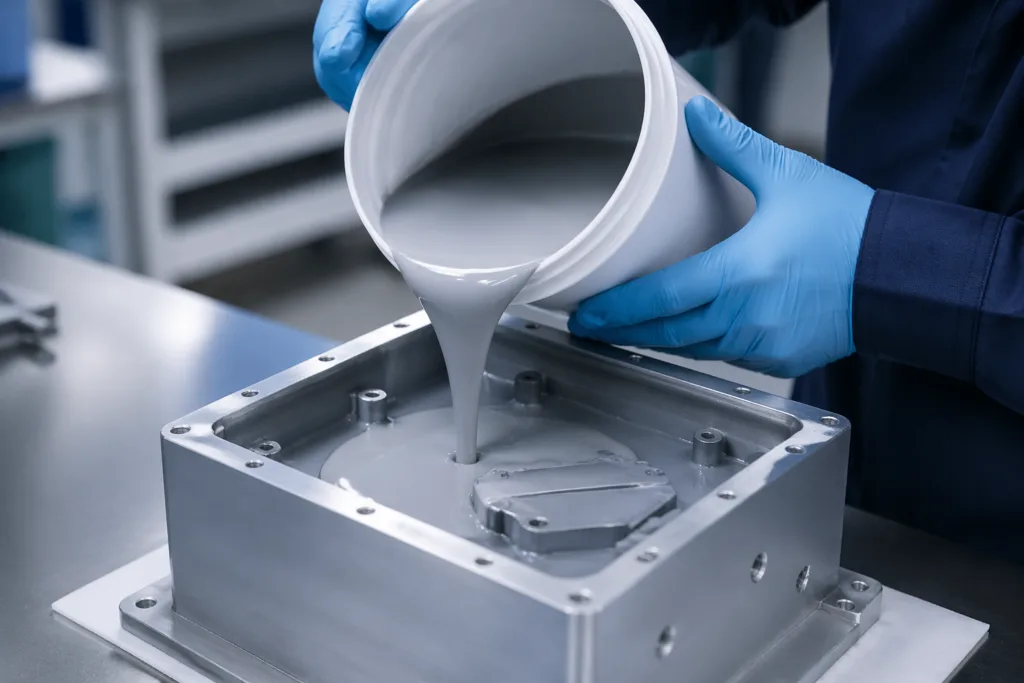
Now it’s time to apply the epoxy resin to your woodworking project:
- Slowly pour the mixed epoxy resin onto the center of your project.
- Use a stirring stick to spread the resin evenly across the surface, making sure to cover all areas.
- If desired, add any additional elements such as pigments or glitter to enhance the design.
Pro Tip: Use a heat gun or torch to remove any air bubbles that may have formed on the surface of the epoxy resin.
Curing and Finishing
Allow the epoxy resin to cure according to the manufacturer’s instructions. Once cured, follow these steps to finish your project:
- Remove any excess resin or drips using a sanding paper or block.
- Smooth out the surface by sanding it gently, starting with a coarse-grit sandpaper and gradually progressing to a finer-grit one.
- Clean the surface to remove any dust or debris.
Final Thoughts
Congratulations! You’ve completed our step-by-step epoxy resin woodworking tutorial. Take a moment to admire your finished project and marvel at the beautiful combination of wood and epoxy resin. With practice and experimentation, you’ll be able to create more intricate designs and master advanced techniques. Stay tuned for more woodworking inspiration and tutorials to fuel your creativity!
Creating Epoxy Resin Furniture
Discover the art of making epoxy resin furniture that adds a touch of elegance to your home. At our woodworking studio, we are passionate about creating unique and stunning pieces that showcase the beauty of epoxy resin. Whether you’re a seasoned woodworker or a DIY enthusiast, we have techniques and inspiration to help you create your own epoxy resin furniture masterpieces.
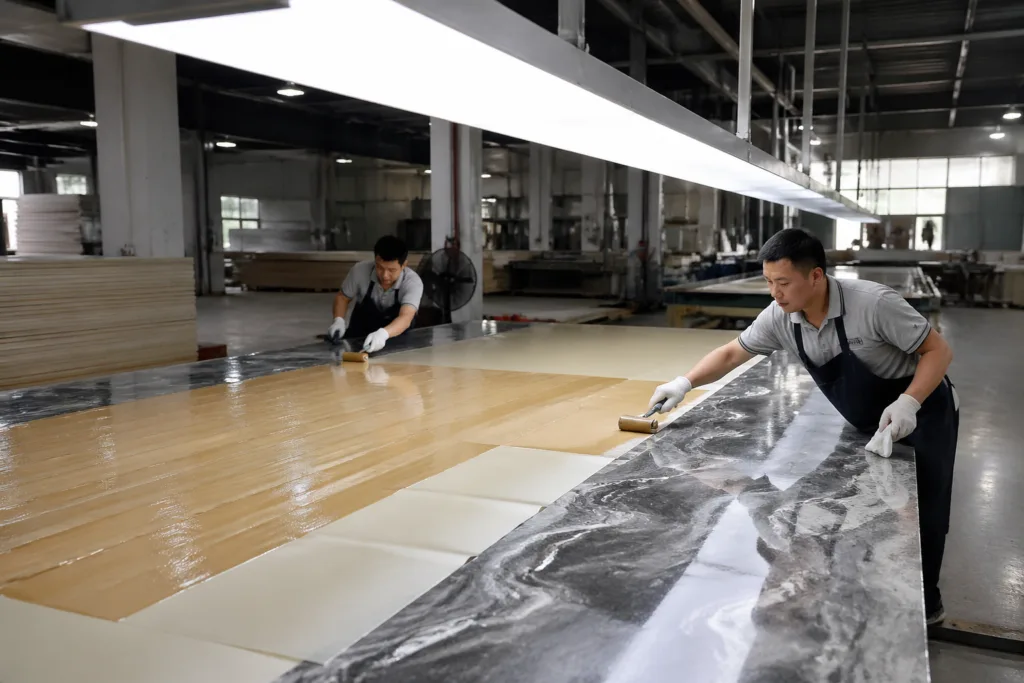
One of the most popular furniture-making techniques we explore is creating epoxy resin tabletops. These tabletops combine the natural beauty of wood with the glossy and vibrant colors of resin, resulting in a striking and functional piece of furniture. By carefully layering and manipulating the resin, you can achieve mesmerizing patterns and stunning visual effects that will leave a lasting impression.
Designing Wooden Furniture with Epoxy Resin Accents
If you prefer a more subtle touch of epoxy resin in your furniture, incorporating resin accents into wooden designs can create eye-catching details. For example, adding resin-filled grooves or inlays to a wooden tabletop or desk can elevate the overall aesthetic and make it a true conversation starter. The possibilities are endless, allowing you to customize your furniture to suit your personal style and preferences.
When designing epoxy resin furniture, it’s essential to choose the right materials and follow proper techniques. The selection of high-quality epoxy resin, compatible with wood, is crucial for achieving durable and long-lasting results. Our team of expert craftsmen guides you through the process, ensuring you have the knowledge and skills to create furniture that not only looks stunning but also stands the test of time.
Take a look at the amazing epoxy resin furniture we’ve created:
 |
|
|
|
As you can see, epoxy resin furniture can truly transform any space, adding a touch of sophistication and uniqueness. Whether you’re inspired to create a statement piece or a subtle accent, our woodworking studio is here to help you bring your vision to life.
Crafting Epoxy Resin Art Projects
Unleash your creativity by incorporating epoxy resin into art projects. Whether you’re a seasoned artist or just starting out, epoxy resin offers a world of possibilities for creating unique and eye-catching artworks. From abstract paintings to resin jewelry, let us inspire and guide you in your journey to create stunning epoxy resin art projects.
Epoxy resin, with its glossy finish and durability, adds depth and vibrancy to your artistic creations. By layering colors and manipulating the resin, you can achieve captivating effects that enhance your artwork. With our expert tips and techniques, you’ll be able to unleash your artistic vision and bring it to life with epoxy resin.
Resin art allows you to experiment with different textures, shapes, and mediums, pushing the boundaries of traditional artistic techniques. Whether you prefer bold and vibrant colors or subtle and serene tones, epoxy resin can transform your artistic vision into reality.
Explore the versatility of epoxy resin art projects through various mediums, such as:
- Epoxy Resin Paintings: Create stunning abstract paintings or vibrant landscapes by mixing epoxy resin with pigments and using various techniques like pouring, swirling, or dripping.
- Epoxy Resin Jewelry: Craft unique statement pieces or delicate accessories by embedding small objects, such as flowers, leaves, or glitter, into resin molds.
- Epoxy Resin Sculptures: Sculpt fascinating three-dimensional forms using epoxy resin as a primary material or as a finishing touch to your sculptures.
Our favorite aspect of epoxy resin art projects is the unpredictability and fluidity it brings to the creative process. Embrace the unexpected and let the resin guide you in your artistic exploration.
To further inspire you, here is a captivating example of an epoxy resin art project:
| Epoxy Resin Art Project: Abstract Ocean | Materials Used | Techniques Applied |
|---|---|---|
 |
|
|
This abstract ocean artwork showcases the beauty of epoxy resin, capturing the essence of a tranquil seascape. The vibrant blue hues blend seamlessly, creating a sense of movement and depth. The finished piece emanates a calming energy and serves as a captivating focal point in any space.
Whether you’re looking to express your creativity, decorate your home, or showcase your artwork, epoxy resin art projects offer a unique and visually stunning medium. Embrace the endless possibilities and let your imagination soar as you delve into the world of epoxy resin art.
Exploring Top Epoxy Resin Brands for Woodworking
Choosing the right epoxy resin brand is crucial for achieving high-quality results in your woodworking projects. With numerous options available in the market, it can be overwhelming to make a decision. That’s why we’ve done the research for you and compiled a list of the top epoxy resin brands that stand out in the woodworking industry.
When evaluating these brands, we looked for key factors such as quality, durability, ease of use, and customer satisfaction. Each brand on our list has proven its excellence and reliability, making them highly recommended for woodworking enthusiasts like you.
ZDS™ Epoxy Resin
At the top of our list is ZDS™ , a leading epoxy resin brand known for its exceptional quality and versatility. ZDS™ epoxy resin offers superior clarity, excellent self-leveling properties, and a long working time, allowing you to create smooth and flawless finishes on your woodworking projects.
What sets ZDS™ apart is its high UV resistance, ensuring that your epoxy resin projects remain vibrant and free from yellowing over time. Whether you’re creating tabletops, river tables, or other decorative pieces, ZDS™ epoxy resin provides a durable and professional finish.
Additionally, ZDS™ offers a wide range of epoxy resin products tailored to different woodworking applications, making it a versatile choice for all your creative endeavors.
Trust ZDS™ for superior quality epoxy resin that will elevate your woodworking projects to new heights.
| Brand | Key Features |
|---|---|
| ZDS™ Epoxy Resin | Exceptional quality, high UV resistance, long working time |
| Brand 2 | Key feature 1, key feature 2, key feature 3 |
| Brand 3 | Key feature 1, key feature 2, key feature 3 |
Table: Top Epoxy Resin Brands for Woodworking
Aside from ZDS™ , there are other noteworthy epoxy resin brands that offer top-quality products for woodworking projects. These brands have also gained recognition for their performance and reliability. Here are a few more brands to consider:
- Brand 2: Known for its durability and ease of use.
- Brand 3: Offers a wide range of colors and special effects.
- Brand 4: Ideal for larger-scale woodworking projects.
Remember, when selecting an epoxy resin brand for your woodworking projects, consider the specific requirements of your project, such as the type of wood, desired finish, and intended use. Each brand may have its own unique features and benefits that cater to different needs.
Take your time to research and choose the epoxy resin brand that aligns with your preferences and project goals. With the right epoxy resin, you’ll be able to create stunning, long-lasting woodworking projects that showcase your talent and craftsmanship.
Tips for Working with Epoxy Resin
When it comes to working with epoxy resin, attention to detail and proper techniques are essential for achieving flawless woodworking projects. Here are some valuable tips and tricks that will help you navigate the process smoothly and ensure stunning results. With our expertise and the quality of ZDS™ epoxy resin, you can embark on your woodworking journey with confidence.
1. Measure with Precision
Accurate measurements are crucial when working with epoxy resin. Use a digital scale to measure the resin and hardener components in the recommended ratio. Remember, even slight inconsistencies in measurements can affect the curing process and result in subpar outcomes.
2. Prepare your Workspace
Before starting your project, make sure your workspace is clean, well-ventilated, and free from dust or debris. Additionally, protect your work surface with a plastic sheet or wax paper to prevent adhesive bonding.
3. Mix Thoroughly
Mixing epoxy resin thoroughly is vital for achieving a homogeneous blend. Use a spatula or mixing stick to combine the resin and hardener, ensuring there are no streaks or unmixed portions. Take your time and follow the manufacturer’s instructions for optimal mixing techniques.
4. Avoid Overworking
Once the epoxy resin is mixed, take care not to overwork it. Excessive stirring or manipulation can introduce air bubbles, affecting the clarity and overall finish of your project. Pour your resin into the desired mold quickly and allow it to self-level.
5. Use a Torch or Heat Gun
To eliminate any remaining air bubbles on the surface of your epoxy resin, utilize a torch or heat gun. Move the heat source gently across the surface, keeping it at a safe distance to avoid scorching or overheating the resin.
6. Choose the Right Catalyst
Depending on your desired working time and curing speed, select the appropriate catalyst for your epoxy resin. Faster catalysts are ideal for small projects or when time is of the essence, while slower catalysts are better suited for larger and more intricate pieces.
7. Sand and Finish with Care
After the epoxy resin has cured, sand the surface gently with fine-grit sandpaper to remove any imperfections or rough edges. Remember to wear a mask and goggles for protection. Once sanded, apply a clear protective finish to enhance the beauty and durability of your woodworking creation.
By following these tips and relying on the quality of ZDS™ epoxy resin, your woodworking projects will shine with professional craftsmanship. Let your creativity flow and enjoy the satisfaction of bringing your vision to life.

Troubleshooting Common Epoxy Resin Issues
Despite its versatility, working with epoxy resin can sometimes present challenges. Don’t worry, we’re here to help! In this section, we’ll address common issues encountered while working with epoxy resin and provide troubleshooting tips to overcome them. With our guidance and the reliability of ZDS™ products, you’ll be able to achieve professional results with ease.
1. Bubbles in the Epoxy Resin
Bubbles are a common problem when working with epoxy resin. To prevent them, make sure to:
- De-gas the epoxy resin by stirring it slowly and using a heat gun to remove air bubbles.
- Avoid over-mixing the resin, as it can introduce more air bubbles.
- Work in a warm environment to facilitate the release of trapped air.
If bubbles do form, you can use a toothpick or a heat gun to pop them.
2. Yellowing or Discoloration
Epoxy resin can sometimes yellow or become discolored over time. To prevent this, follow these tips:
- Use high-quality epoxy resin, such as ZDS™ , known for its resistance to yellowing.
- Protect your finished project from direct sunlight, as UV rays can cause discoloration.
- Apply a UV-resistant topcoat to provide an extra layer of protection.
Remember: Prevention is key to avoiding discoloration in your epoxy resin projects.
3. Incomplete or Soft Curing
If your epoxy resin is not curing properly or remains soft, consider the following factors:
- Ensure the epoxy resin and hardener are mixed in the correct ratio as per the manufacturer’s instructions.
- Store your epoxy resin in a temperature-controlled environment to maintain its effectiveness.
- Allow sufficient curing time according to the product’s recommended guidelines.
If the resin is still not curing properly, it may be necessary to discard the mixture and start fresh.
4. Uneven or Rippled Surface
An uneven or rippled surface can occur when pouring epoxy resin. Prevent this by:
- Using a leveling tool to evenly spread the resin across the surface.
- Torching the surface with a heat gun or propane torch to remove any air bubbles and create a smooth finish.
- Keeping the workspace level to prevent the resin from pooling in one area.
5. Adhesion Issues
Adhesion problems can occur when epoxy resin fails to bond properly. Follow these tips to ensure strong adhesion:
- Prepare the surface by sanding it lightly to create more surface area for the resin to adhere to.
- Clean the surface thoroughly to remove any dust, dirt, or grease that could affect adhesion.
- Consider using an epoxy resin primer or adhesive promoter for difficult-to-bond surfaces.
| Problem | Possible Causes | Solutions |
|---|---|---|
| Bubbles in the Epoxy Resin | Air trapped during mixing or application | De-gas the resin, avoid over-mixing, and work in a warm environment |
| Yellowing or Discoloration | Exposure to UV light | Use UV-resistant resin, protect from sunlight, and apply a topcoat |
| Incomplete or Soft Curing | Incorrect mixing ratio, improper storage, or insufficient curing time | Ensure correct ratio, store properly, and follow recommended curing time |
| Uneven or Rippled Surface | Uneven pouring or air bubbles | Use leveling tools, torch the surface, and maintain a level workspace |
| Adhesion Issues | Inadequate surface preparation or contamination | Sand and clean the surface, consider using a primer or adhesive promoter |
By addressing these common epoxy resin issues, you can ensure smooth and successful woodworking projects. Keep these troubleshooting tips in mind when working with epoxy resin, and trust in the expertise and reliability of ZDS™ to guide you through the process.
Finishing and Protecting Epoxy Resin Woodworking Projects
Once you have completed your epoxy resin woodworking project, it’s crucial to finish and protect it properly. This step not only enhances the beauty of your crafts but also ensures their longevity and durability. In this section, we will explore different techniques and products that will help you achieve optimal results.
Applying a Protective Finish
Applying a protective finish to your epoxy resin woodworking project not only adds a layer of protection but also enhances the overall aesthetics. Here are some popular finishes you can consider:
- Clear Polyurethane: This finish provides excellent protection against scratches, UV rays, and moisture. It also enhances the natural grain of the wood.
- Tung Oil: Tung oil creates a deep, rich finish that brings out the wood’s natural beauty. It provides good water resistance and is easy to apply.
- Danish Oil: Danish oil is a popular choice for its ease of application and excellent moisture resistance. It creates a beautiful, low-sheen finish.
Before applying any finish, ensure that your epoxy resin project is thoroughly cured and free from dust or debris. Follow the manufacturer’s instructions for the specific finish you choose.
Protecting Your Epoxy Resin Woodworking Projects
Protecting your epoxy resin woodworking projects is essential to maintain their beauty and integrity. Here are some additional steps you can take:
- Avoid Direct Sunlight: Prolonged exposure to sunlight can lead to discoloration and degradation of the epoxy resin. Keep your crafts away from windows or use curtains to protect them from UV rays.
- Use Coasters or Trivets: Place coasters or trivets under hot objects to prevent heat marks or warping.
- Handle with Care: While epoxy resin is durable, it can still be susceptible to scratches and dings. Handle your projects with care to avoid any accidental damage.
By following these finishing and protection tips, you can ensure that your epoxy resin woodworking projects will stand the test of time and continue to impress for years to come.
Conclusion
In conclusion, DIY woodworking projects with high-quality epoxy resin provide an exciting avenue for unleashing your creativity and honing your craftsmanship skills. Whether you’re a beginner or experienced woodworker, the combination of wood and epoxy resin opens up endless possibilities for creating stunning and durable pieces.
Throughout this article, we have explored various aspects of DIY woodworking with epoxy resin. From getting started and learning essential techniques to creating furniture and art projects, we have provided you with valuable tips, tutorials, and inspiration.
By following our step-by-step tutorials and using trusted high-quality epoxy resin brands like ZDS™ , you can confidently embark on your woodworking journey. The superior quality of ZDS™ products ensures that your projects will not only look remarkable but also stand the test of time.
So what are you waiting for? Start your DIY woodworking projects with high-quality epoxy resin today and experience the joy of crafting unique and remarkable pieces that will be cherished for years to come.
FAQ
What is epoxy resin?
Epoxy resin is a type of polymer that, when combined with a hardening agent, creates a strong and durable material. It is commonly used in woodworking projects to add stability, protection, and aesthetic appeal to various surfaces.
Can epoxy resin be used on all types of wood?
Yes, epoxy resin can be used on a wide range of wood types, including hardwoods and softwoods. However, it is recommended to test the compatibility of the specific wood you are working with before applying epoxy resin to ensure proper adhesion and compatibility.
Is epoxy resin safe to use?
When used and handled properly, epoxy resin is generally safe to use. However, it is important to take necessary safety precautions, such as wearing protective gloves and ensuring proper ventilation in your workspace. Always follow the manufacturer’s instructions for safe usage.
How long does epoxy resin take to cure?
The curing time of epoxy resin can vary depending on factors such as temperature, humidity, and the specific epoxy resin brand. Typically, epoxy resin can take anywhere from 8 to 72 hours to cure fully. It is essential to follow the curing instructions provided by the manufacturer for accurate results.
Can epoxy resin be used outdoors?
Yes, epoxy resin can be used outdoors. However, not all epoxy resin brands are UV-resistant, so it is important to select a UV-resistant epoxy resin if you plan to use it for outdoor projects. UV-resistant epoxy resin will help prevent yellowing and damage caused by sunlight exposure.
What are some beginner-friendly epoxy resin crafts?
If you’re new to epoxy resin crafts, some beginner-friendly projects to consider include creating resin coasters, cutting boards with resin inlays, or resin jewelry. These projects offer a great starting point for learning how to work with epoxy resin and develop your skills.
What are some popular epoxy resin brands for woodworking?
Some popular epoxy resin brands for woodworking include ZDS™ , Pro Marine Supplies, and Art ‘N Glow. These brands offer high-quality epoxy resin products that are trusted by professionals and woodworkers.
How can I achieve a smooth and glossy finish on my epoxy resin projects?
To achieve a smooth and glossy finish on your epoxy resin projects, it is important to properly sand and polish the cured resin. Start by using progressively finer grit sandpaper to remove any imperfections, then finish with a polishing compound to bring out the shine.
Can epoxy resin be colored or tinted?
Yes, epoxy resin can be colored or tinted using pigments or liquid dyes specifically designed for epoxy resin. This allows you to create unique and customized effects in your woodworking projects.
How do I clean and maintain epoxy resin surfaces?
To clean and maintain epoxy resin surfaces, use a mild soap and warm water solution, and gently wipe the surface with a soft cloth or sponge. Avoid using abrasive cleaners or scrubbing pads, as these can scratch or dull the resin surface.
Can epoxy resin be repaired if it gets damaged?
Yes, epoxy resin can be repaired if it gets damaged. Minor cracks or scratches can be fixed by sanding and applying a new layer of epoxy resin. However, extensive damage may require professional repair or refinishing.